Success Music Studio

Playing the Piano with Color Coded Rhythm, Fingering, and Notes - Piano, Bench, and Mic

Playing the Piano with Color Coded Rhythm, Fingering, and Notes

Facebook
Twitter

Estimated reading time 3 minutes

Table of Contents

Introduction

Can’t read piano music? (Or does your child have difficulty reading music?) Color coded notes and rhythms can help! Keep reading to learn about playing the piano with color coded rhythm, fingering, and notes.

Don’t have a keyboard? This online keyboard will help:

This post uses music terms. For definitions, see the Glossary at the end of the article.

Playing the Piano with Color Coded Rhythm, Fingering, and Notes - Piano Student - How to Play Piano (Kid’s Color Coded Piano Hand Placement)

Playing the Piano with Color Coded Rhythm, Fingering, and Notes: The Hand Position

Mobile users: for best results reading the music, tilt your screen 90o to the right.

Playing the Piano with Color Coded Rhythm, Fingering, and Notes - C Position - Playing Piano with Color Coded Left Hand Notes and Rhythm - 
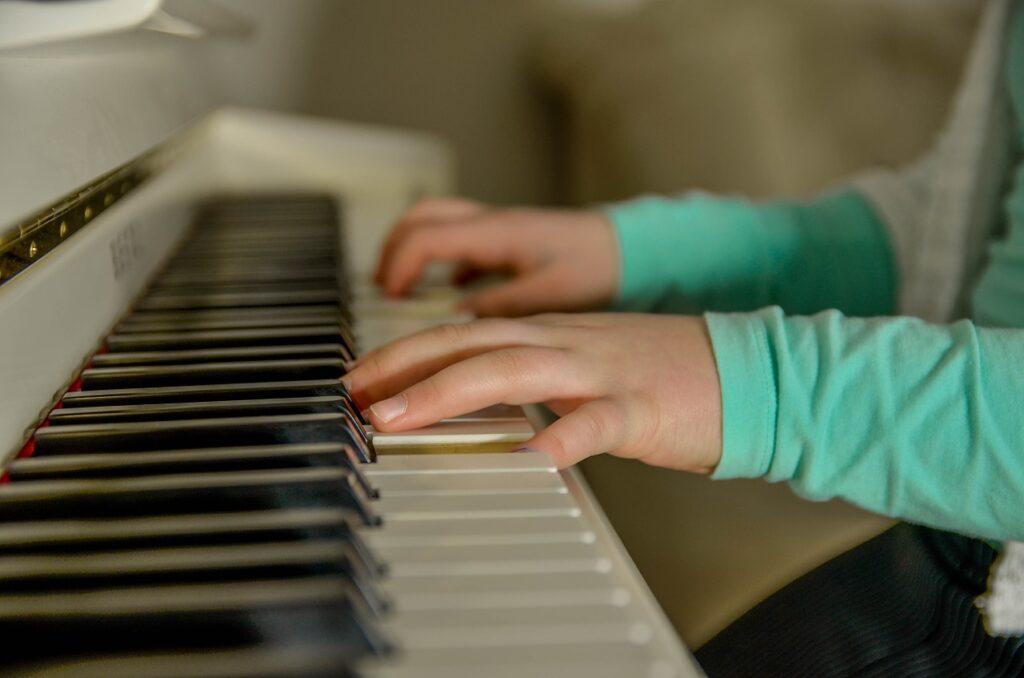
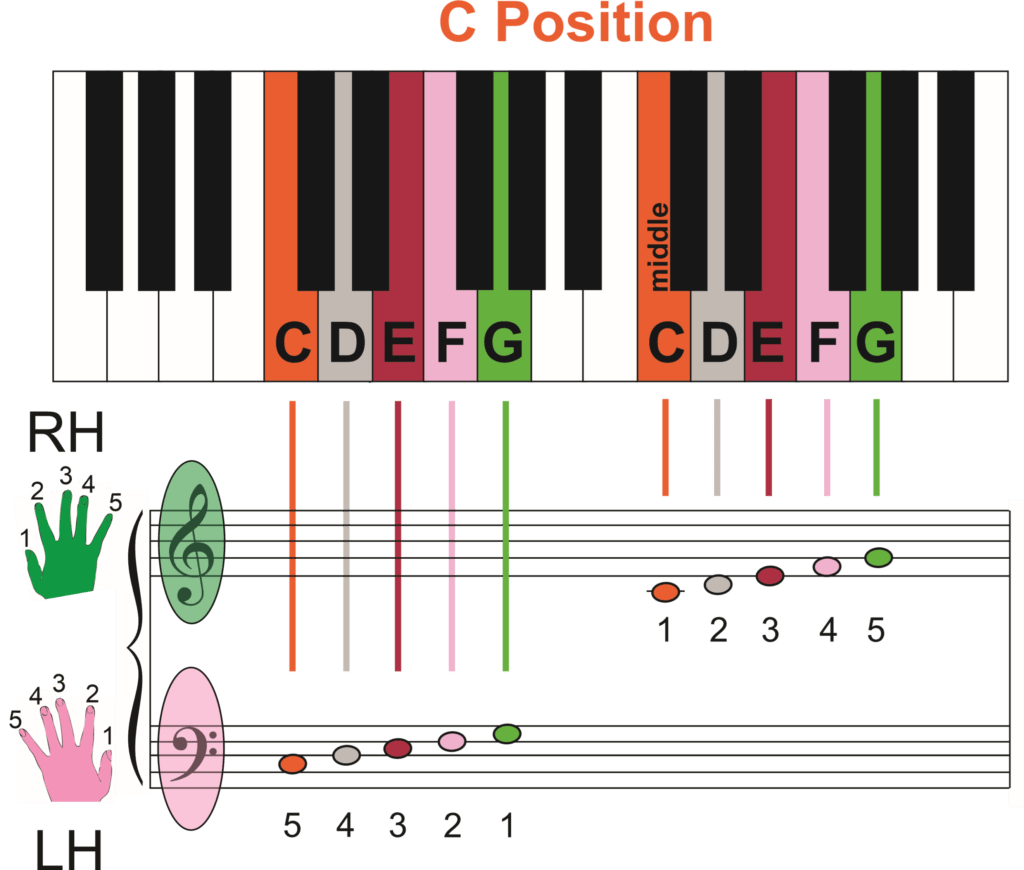
Piano Major Scales (Basic Fingering Concepts)

Hand Icon (churien.deviantart.com/art/hand-template-blank-272630198) by Churien is licensed under CC BY (creativecommons.org/licenses/by/3.0). Modified by Geoffrey Keith.

Before you can play the piano with color coded notes or rhythm, you need to know where your hand goes on the keyboard. In this post, you’ll use the right hand (RH) in C position.

The C position diagram above shows the placement for both hands. However, you’ll just play the notes to the right side of the diagram using this fingering:

  • First Finger: The thumb goes on the C (orange) key
  • Second Finger: The pointer finger goes on the D (gray) key
  • Third Finger: The middle man goes on the E (red) key
  • Fourth Finger: The ring finger goes on the F (pink) key
  • Fifth Finger: The pinky goes on the G (green) key

If you get confused on your fingering, you can also apply colored stickers to color code the fingers:

Pop Goes the Weasel and Playing the Piano with Color Coded Rhythm, Fingering, and Notes

First, try counting and clapping the rhythm:

  • Red = clap
  • Blue = don’t clap
  • Brown = rest = opposite clap

In Pop Goes the Weasel you’ll have three counts per bar. For more information on color coded clapping:

Try to play the piano with the color coded notes and rhythm:

  1. Say the note names while playing, going from left to right.
  2. Then, play the melody while counting the rhythm.
  3. Next, play and say the finger numbers – the black numbers.
  4. Do your best to keep a steady pulse.

I’ve made a soundtrack that shows you how Pop Goes the Weasel should sound.

  • DON’T LISTEN TO THE SOUNDTRACK BEFORE ATTEMPTING THE SONG.
  • Instead, listen to the soundtrack afterward to make sure you’ve played the song right.

Once you have Pop Goes the Weasel down, you can then try reading the quiz below. Remember to say the note names as you play.

Pop Goes the Weasel Arrangement:

Playing the Piano with Color Coded Rhythm, Fingering, and Notes - Pop Goes the Weasel RH line 1
Playing the Piano with Color Coded Rhythm, Fingering, and Notes - Pop Goes the Weasel RH line 2
Playing the Piano with Color Coded Rhythm, Fingering, and Notes - Pop Goes the Weasel RH line 3
Playing the Piano with Color Coded Rhythm, Fingering, and Notes - Pop Goes the Weasel RH line 4
Playing the Piano with Color Coded Rhythm, Fingering, and Notes - Pop Goes the Weasel RH line 5
Playing the Piano with Color Coded Rhythm, Fingering, and Notes - Pop Goes the Weasel RH line 6
Playing the Piano with Color Coded Rhythm, Fingering, and Notes - Pop Goes the Weasel RH line 7
Playing the Piano with Color Coded Rhythm, Fingering, and Notes - Pop Goes the Weasel RH line 8

Playing the Piano with Color Coded Rhythm, Fingering, and Notes: Notes Quiz

Playing the Piano with Color Coded Rhythm, Fingering, and Notes - Quiz line 1
Playing the Piano with Color Coded Rhythm, Fingering, and Notes

Final Thoughts on Playing the Piano with Color Coded Rhythm, Fingering, and Notes

The more you play the piano with the color coded rhythm, fingering, and notes, the better you’ll get at playing.

  • This multisensory teaching strategy will help any reluctant reader to interact with the score better.
  • In addition, color coding is my go-to strategy when teaching kids with ASD, LD, ADD, and special needs.

When ready, a student can begin the process of graduating from the colors. These posts give you a step-by-step guide to learning how to read a color-free score:

Have fun playing!

Related Posts:

© 2023 Geoffrey Keith

Newsletter Signup

Join me for in-person or online lessons today!

Back to the Color Coding category blogs page

Back to the Successful Music Student blogs page

Glossary

Is There a Better Way to Learn Sight Singing - Snowy Sheet Music - How To Color The Music Score - Singing Intervals

Is There a Better Way to Learn Sight Singing?

Do you find sight reading hard to do? Have you ever asked if there is a better way to learn sight singing? Shape notes can really help. Click to answer the question, “Is there a better way to learn sight singing?” Estimated reading time 3 minutes.

Read More
It’s back to school time!

It’s Back to School Time!

It’s back to school time! I offer TWO FREE LESSONS so you can come in and check out my unique multisensory teaching methods. Estimated reading time 1 minute.

Read More
How to Graduate from the Color Coded Music Score - Graduation Choir

How to Graduate from the Color Coded Music Score: Part 3

Do your students get confused by space note D at the bottom of the treble staff? Or do they have a problem with space note B on the top of the bass staff? Read more to learn how to switch from color coded notes to special mnemonics, allowing students to graduate from the color coded music score. Estimated reading time 4 minutes.

Read More